
Request Quote

Home | How to do it | HOW TO CUT VINYL SIDING

Vinyl is known for its durability and low cost. When deciding to re-side your home, it is the most popular siding material among homeowners to choose. Vinyl siding is made of a thick firm plastic that is treated to resist rot and repel moisture. It gives you a protective barrier to your home’s exterior walls.
Available in a variety of styles and made to mock other materials, you can attain any look imaginable by using vinyl siding. The main advantages are its low cost, easy installation, and low maintenance. Although the installation process isn’t too hard, it’s best when done by a trusted contractor. If you don’t want to take the risk of self-installation, Legacy Service should be your number choice in contractors for your siding project. If you are willing to take on the challenge we want to provide you with some tips on the best way to cut vinyl siding.
Not a real zip code.
The most important factor to a professional and uniform siding job is being able to cut the siding to fit your home. Even the slightest disparity will create a sloppy job and cost you money on repair in the long run.
You may be wondering what do you use when cutting vinyl siding. We’ll provide you with a detailed list of different tools and descriptions to help you avoid cracking and rough edges when cutting your siding.
The tools needed for this project are pretty simple. A mix of hand tools and power tools can be used. When it comes down to which one is the best vinyl cutter, it may depend on your personal preference.
Bench saws are a compact mounted circular saw attached to a stationary cutting table. When cutting vinyl siding, the installer will most likely use a miter saw, radial arm saw, jig saw, or chop saw to produce detailed cuts through the planks. Because chop saws can only cut at a right angle, it is best to use a miter saw or radial arm saw for more complex cuts. Despite which saw you decide to use, your bench saw MUST be fitted with a fine-toothed blade to give your siding the most precise cut. Installing the blade backward will give you a jagged free cut by melting the edges of the siding. Fine-toothed blades have the ability to cut through durable materials without burning, cracking or causing other types of damage.
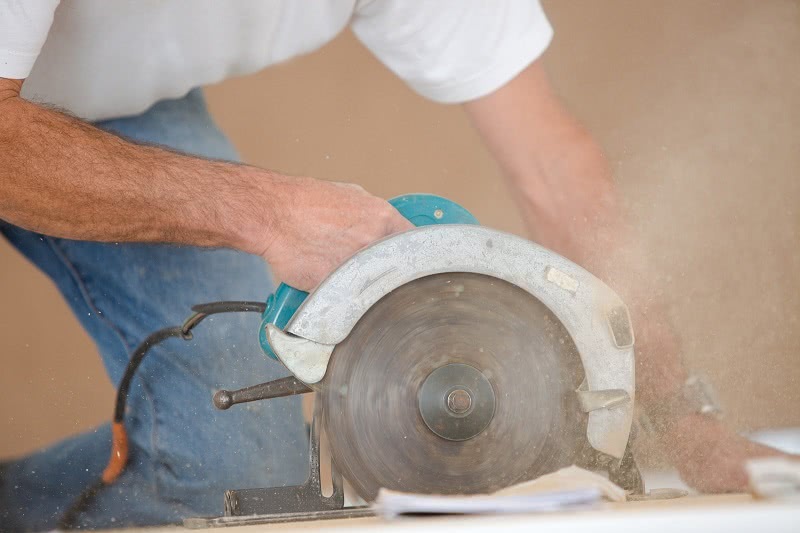
Handheld circular saws are perfect for crosscuts and rip cuts when cutting vinyl siding. They are lightweight, sometimes corded, sometimes not, and very portable. Its portability allows installers to easily transport the tool throughout different areas of their workspace. Most circular saws are able to get the job done when it comes to cutting vinyl siding as long as they are fitted with a fine-toothed blade.
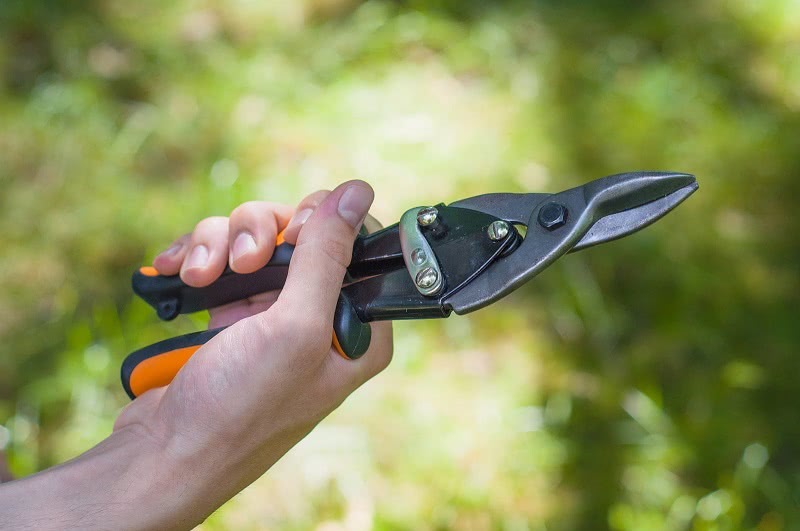
Tin Snips are the craftsman’s scissors in the construction world. Mainly used for cutting soft metals, tin snips are also the perfect shears for easily slicing through vinyl siding. When using tin snips, installers can cut unusual and intricate shapes. Although they look common to household scissors, snips are much stronger because of their wedge-shaped cutting blade and compound cutting action.
Sneak a look inside any craftsman’s toolbox and you’ll see a utility knife. Also known as a box cutter, this tool is great to have when an installer needs to make a swift and localized cut through the vinyl siding. Utility knives consist of a miniature blade that retracts into its palm-sized handle. The blade is controlled by a sliding button located at the top of the handle. This tool is great to have and very lightweight, versatile, and inexpensive. Although it may not serve as the cutters for vinyl, it comes in handy when trying to cut away small parts of preinstalled vinyl siding.
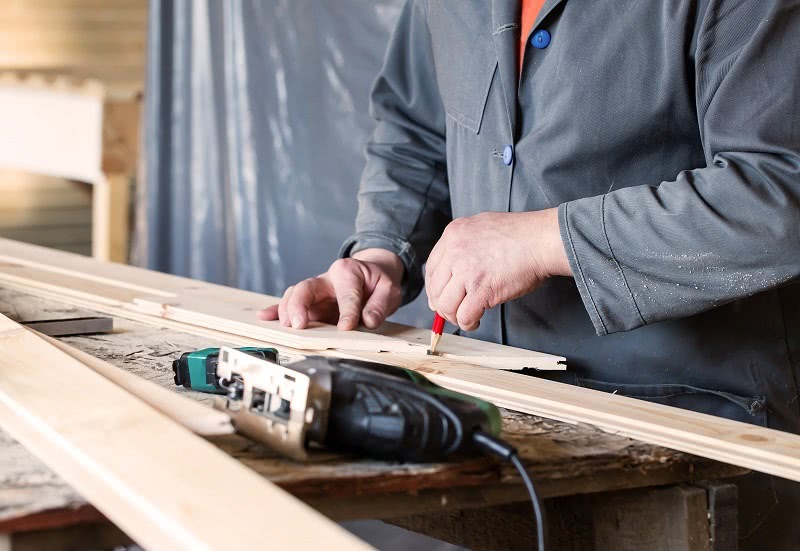
Use a standard measuring tape to determine the amount of siding you’ll need to cut off. Measure the length of the wall that will be covered with siding, then subtract that measurement from the piece being cut. This equation should give you the exact amount of siding you have to cut. Make sure to measure around doors and around windows, not adding more siding than needed. It’s best to use a carpenter’s pencil when marking the line that will be cut. This will give you a very dark visible line that’s easy to follow as your cutting.
Not a real zip code.
To keep your siding in place, firmly hold it with your non-dominant hand as you are starting to cut. Make sure to grip it close to the marked line so there is no shifting while making your cut. Using the tin snips, slowly cut along the marked line. It’s best NOT to close the blades completely while cutting the siding. Slowly open and slightly close the snips across the vinyl until you are at the other end of the siding, this will give you a clean uniform cut.
*Be sure to ALWAYS wear your safety goggles while cutting vinyl siding.
Continue this practice on the remaining siding. Use the piece you cut first as a marker for measurements on the siding that still needs to be cut.
Carefully measure the wall to determine the amount of siding that needs to be cut. Starting from the top, horizontally measure the segment of the wall that the siding will cover. Subtract that amount from the siding’s height, and that will give you the total amount of how much siding you will need to cut.
Here are the questions that we’re most often asked about cutting vinyl siding.
A utility knife is typically the best tool for cutting vinyl siding when you’re making longitudinal cuts along the length of a plank. If you’re only making a few vertical cuts, it’s best to use tin snips or a hand saw. Last but not least, another vinyl siding cutting tool is the circular saw. This is the best option for making short, vertical cuts.
The best way to cut vinyl siding depends on how it needs to be cut. If you’re making short, vertical cuts, we recommend using a circular saw. For long, vertical cuts, tin snips tend to work the best. For horizontal cuts, we suggest using a regular utility knife.
Yes, cutting vinyl siding with a miter saw is a great option. This type of powered circular saw can be positioned at a variety of angles to make complex cuts easier. Before you start, make sure your saw is fitted with a fine-toothed blade for the most precise cut. Other saws you can use as a vinyl siding cutter include chop saws, jig saws, and radial arm saws.
Yes, you can cut vinyl siding with a chop saw. Chop saws are best used for making boards shorter. However, you’ll need to keep in mind that standard chop saws can only cut at a right angle, so it’s best to use a radial arm or miter saw for a cut that’s more complicated.
The type of Cricut blade you’ll need depends on the type of project you’re working on. The best saw blade for vinyl siding will also differ depending on how thick or thin the siding is. For thinner vinyl siding, a fine-point blade is recommended. For thicker vinyl, a deep-point blade is recommended.
How to cut vinyl siding is a question asked by many homeowners. For vinyl shake siding, you can cut panels using snips or a circular saw with a blade that can be used for vinyl. Snips work best for long, vertical cuts while circular vinyl siding saws work best for short, vertical cuts.
Cutting vinyl siding around windows is a multi-step process. After you cut and install the molding, it’s time to cut the siding. Follow this process:
Cutting vinyl siding on a door is a multi-step process. They include:
Not a real zip code.
There are a few reasons why your Cricut might not be cutting your vinyl. Fortunately, some basic troubleshooting can usually resolve this.
Yes, utility knives are recommended when you want to cut vinyl siding horizontally. To do this right, follow the correct steps in order. First, place the strip of siding faceup on a work table, and place a straightedge on the siding to mark where you want to cut it. Use the utility knife to score along the straightedge. Once it’s scored, bend it along the line until it snaps clean.
Powered circular saws using a blade that’s mounted backward are known to provide the cleanest and easiest cuts for vinyl siding. For fine-toothed jigsaws, a 36 TPI rating will be sufficient for the job. A 36 TPI rating means the blade has 36 teeth per inch. Hacksaw blades should have a 32 TPI rating.
You may need to cut and install vinyl siding when it’s cold, which poses a greater risk of cracking or breaking. If that’s the case, it’s a good idea to know how to cut cold vinyl siding. While wearing safety glasses, use a circular saw with a backward fine-toothed blade to slowly cut vinyl strips to size. The blade and cutting slowly will allow for a smoother cut.
There are three different types of vinyl siding cutters that are good for beginners as well as those who are more experienced. They include tin snips, a circular saw, and a utility knife. You can purchase each of these tools at your local hardware store. Keep in mind that while a circular saw will be the most expensive option, it’s also the fastest and relies the least on human muscle and accuracy.
There are three common ways to help you cut vinyl siding without cracking it. They include using a circular saw for short vertical cuts, using tin snips for long vertical cuts, and using a utility knife for horizontal cuts. Following the correct steps and cutting carefully will help prevent the siding from cracking when you cut it.
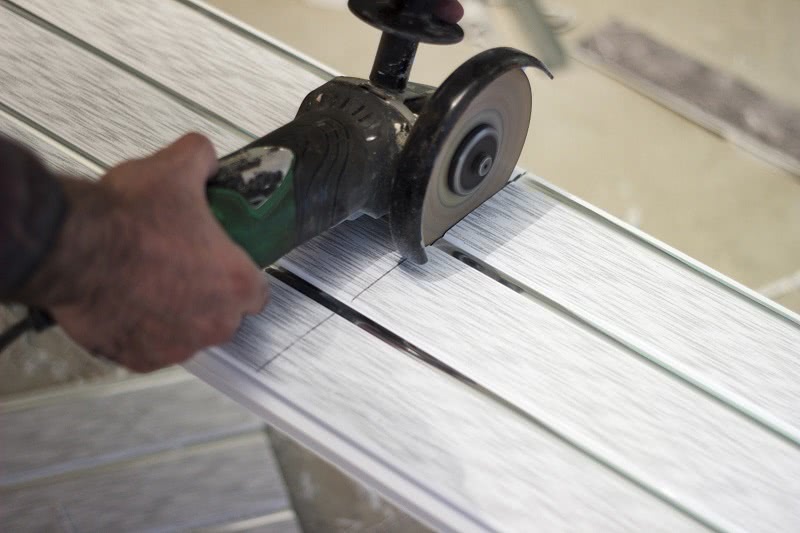
Angle grinders are not as commonly used to cut vinyl siding as the other tools we’ve mentioned, but they are just as effective! Grinders can cut through vinyl as quickly as a miter saw, but they’re smaller and more portable. However, you’ll have to make sure you’re using the correct cutting wheel because some of them can melt the vinyl. We suggest using a metal cutoff wheel.
Yes, you can cut vinyl siding with a multi-tool, also known as an oscillating tool. This portable tool runs on electrical power to cut different materials. To cut the material, use a measuring tape to take measurements of the wall and vinyl board. Then, make sure the siding is held down tightly on a flat surface and cut the board into your desired size and shape.
When cutting vinyl siding (including scoring it with a utility knife), the siding should be face up. While you’re scoring, remember to apply medium pressure, and then you can carefully snap the piece off. If the siding doesn’t snap easily, you can bend it forward and backward until it breaks.
Miter saws are good for more complex vinyl siding cuts. Just remember that the bench saw must be fitted with a fine-toothed blade. This will help give your siding the most precise cut because these types of blades can cut through durable materials without cracking or causing other types of damage.
It’s tougher to cut vinyl siding in cold weather because it’s more likely to crack. Vinyl siding should be cut at no less than 40°F, but it should preferably be 50°F or higher. This temperature will help minimize the amount of shrinkage or growth, making it easier to cut.
Once it’s time for you to begin putting your vinyl siding on the house, it’s still important to pay attention to detail. Be sure not to cut corners on small materials like nails and trim. It could cost you your whole project. Always remember that with self-installation, comes risks. The easiest way to ensure a perfect siding job is to call your local dependable experts at Legacy Service. Based in Pennsylvania, we’ve been at the top of the market for years and will always be dedicated to providing you with the highest quality exterior work. Give us a call today to receive a hassle-free and transparent estimate on your next siding project.


