
Request Quote

Home | How to do it | How to Install a Metal Roof Valley

Metal roofing may come in all shapes and sizes, but one thing you can be sure of is that it looks fantastic on just about any home. They also provide plenty of long-lasting benefits. A metal roof’s lifespan can last up to 50 years, it’s energy-efficient, resistant to fire, and it comes in beautiful styles that match any home or neighborhood. With that being said, it’s hard to imagine why any homeowner wouldn’t want to get a metal roof.
But we’re not here to talk about how great metal roofs are in this article; we’re here to talk about valleys on metal roofs and how to install them. By reading this blog, you’ll learn more about what roof valleys are, why they’re important, and how to form a valley on a roof.
Not a real zip code.
At Legacy Service, we’re dedicated to improving your house’s exterior so that you’re completely satisfied with your home. Along with roofing services, we also provide siding installation and replacement, windows and doors installation and replacement, and gutter installation. If you’re looking to build the home of your dreams, we’re the team to call. Contact us at 215-798-9790 or by filling out a form at https://legacyusa.com/contact/ to learn more and receive a free estimate.

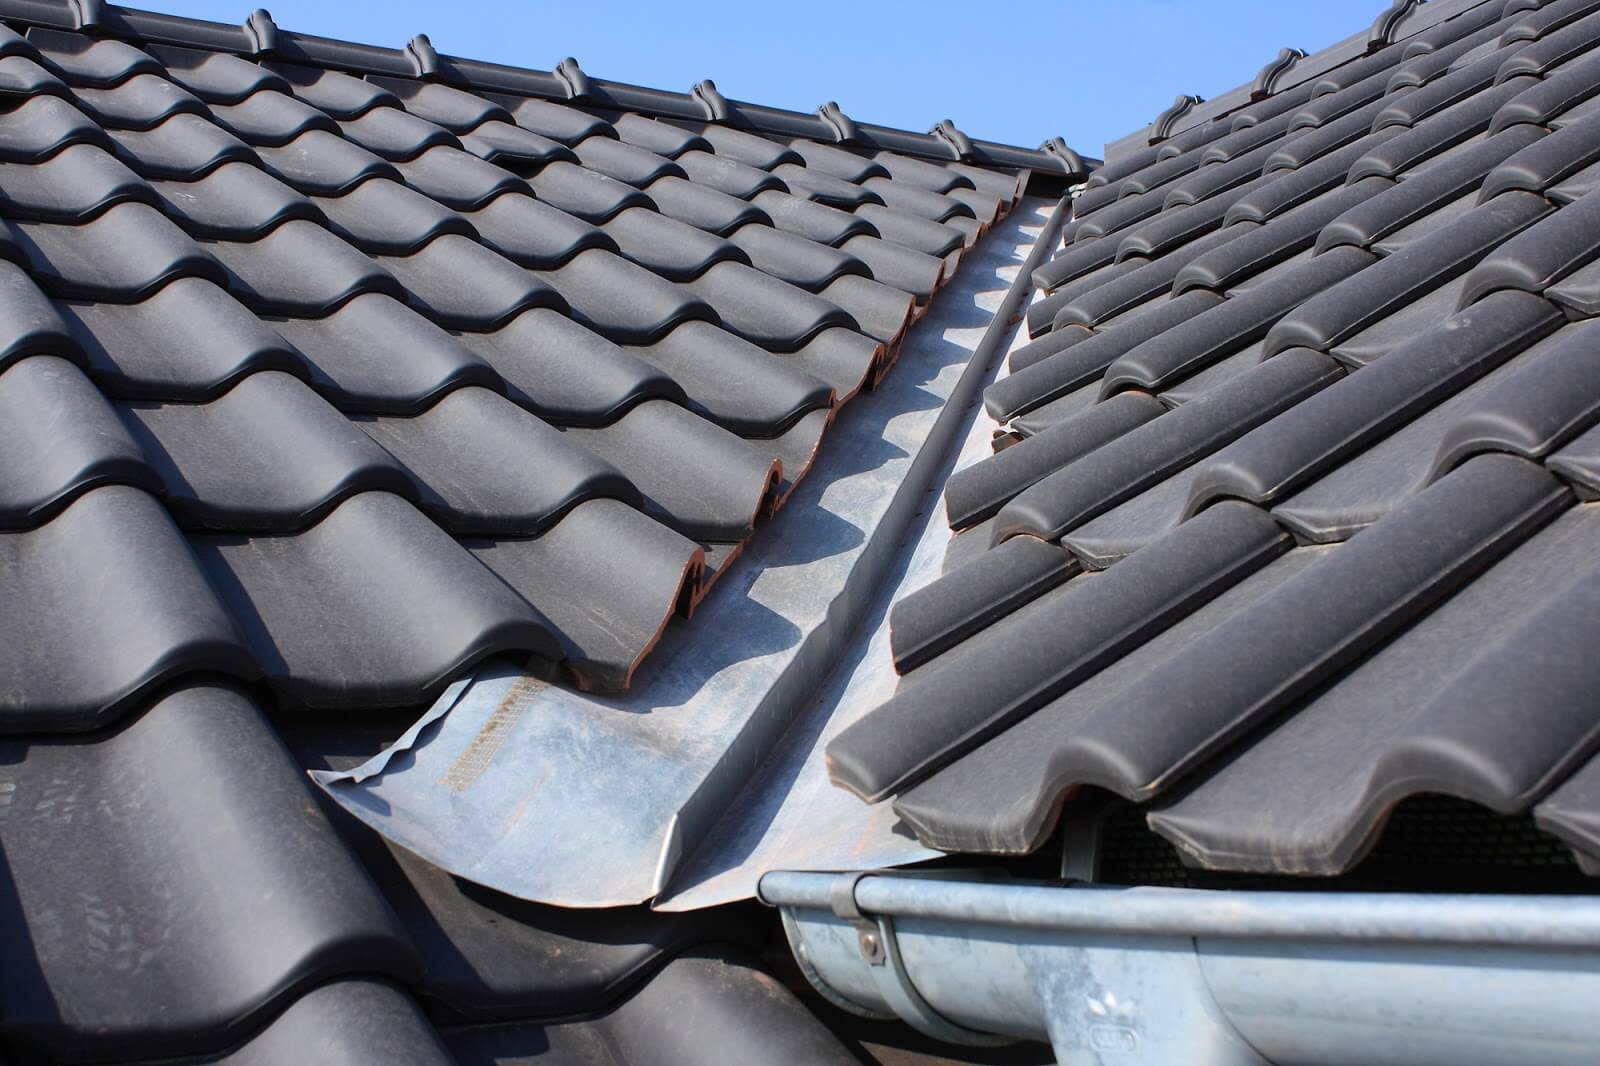
The valley of the roof is formed where two slopes meet. Water collects there to flow off of the roof. The installation method for metal roofing valleys is crucial because they’re risks for serious leaks when they’re not installed properly. There are two main types of valleys:
Open Valleys: With this type, the valley line is covered by a valley component instead of the main roofing panel system. They’re protected by a combination of underlayments and a metal valley component. First, an ice and water shield covers the decking. Then, an underlayment goes over the barrier. Finally, a “V” or “W” shaped piece of metal is installed on top. It’s called an open valley because the metal remains open to carry water off the roof.
Closed Valleys: Closed valleys are more often used with asphalt roofs instead of metal ones. The valleys are either woven into the shingles or they meet to form a straight line down the center of the valley. They’re typically not recommended for metal roofs because they’re designed to carry water under the panels but can fail over time because they get clogged.
All in all, an open valley is recommended with a metal roof. Continue reading to learn about why they’re important and the best methods of installation.
Metal valleys on a roof are important because metal is typically the most durable material. It provides a long-lasting solution since it’s not only extremely versatile but it also can be used in almost any situation, and it resists damage from rain, wind, hail, and fallen debris.
Metal valleys can add longevity and durability to almost any roof. One of the best things is that they effectively protect other parts of your roof, from the roof deck to the felt and shingles. When all of the roofing components are working properly, your roof’s lifespan will be maximized.
So, how do you put a metal roof on a valley? Unless you have plenty of experience with roofing, we suggest hiring a team of professionals to complete this project. Working with metal roofs and installing valleys can be challenging, especially for someone who doesn’t typically do this type of work. After all, no one wants to be sitting on their roof in tears of frustration after a long day.
However, it’s still good to know valley roofing techniques and how the process is done. So, let’s get started learning about valley trim preparation:
Let’s take a look at what to do next.
Roof valleys are similar to gutters, except for the fact that they have steeper pitches and the stakes are much higher when it comes to installing valleys. You’ll have to keep that in mind when you cut metal roofing to fit the valleys.
Not a real zip code.
Here’s how you can do it:
Learn more about marking angles and how to cut metal roofing for valleys.
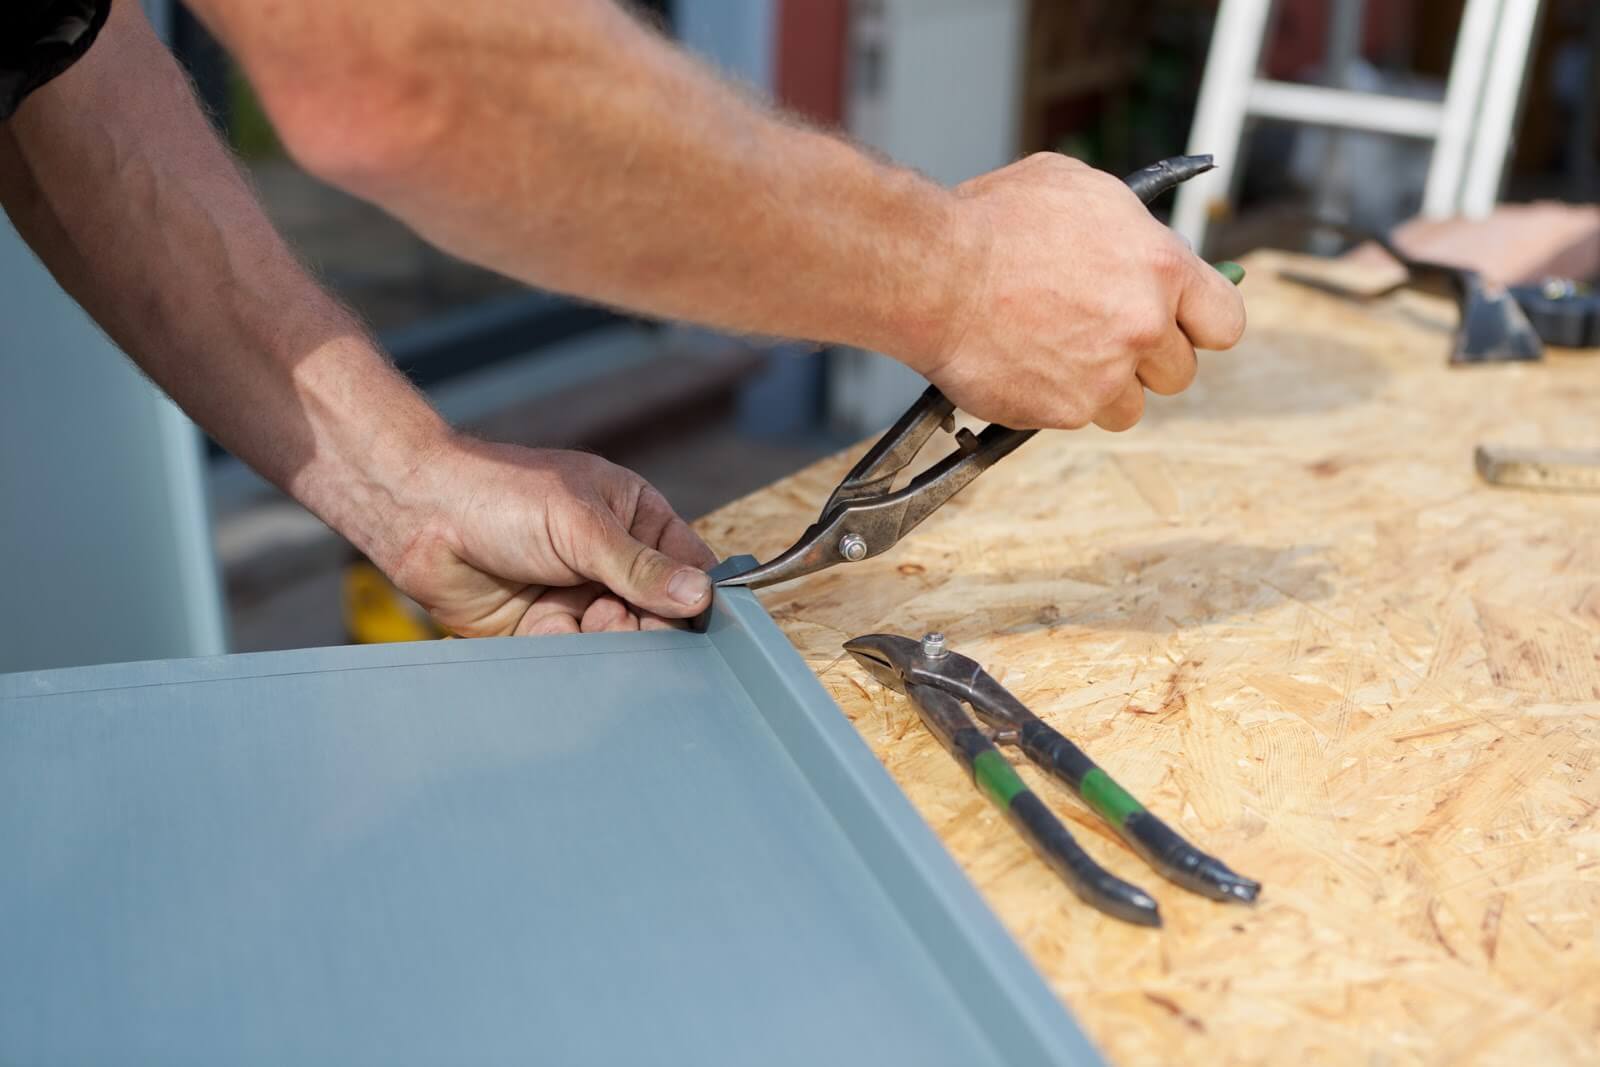
Now it’s time to bend the eave clip so that the panel can be installed. Start by transferring the measurements to the back of the panel. You’ll want to add an inch for a hem so it can be clipped into the offset cleat in the valley and along the eave. Once everything’s all set, it’s time to install the valley panel.
Most homes are composed of multiple additions that result in the need for valleys. The metal that’s used for roofing valleys is more similar to roof flashing than it is to roofing material. Here are the steps to installing valley flashing for metal roofs:
If you’re looking for how to install metal roofing in a valley, please look no further than our team here at Legacy Service. Whether you need metal roofing valley instructions or a company that will provide the service for you, you can count on us. Installing valley flashing on a metal roof can be a difficult job, especially for someone who isn’t used to working with roofs. That’s why it’s good to hire professionals who can take care of the job for you. When it’s done correctly, roofing valleys protect your home from all types of weather, from rain and snow to sleet and hail.
At Legacy Service, please feel free to contact us for any of your home exterior needs. Our team of experts provides service for roofing, siding, windows, doors, and gutters. Whether you’re in need of a roofing replacement or siding installation, you know who to call. You can reach us at 215-798-9790 or by filling out a contact form here.


